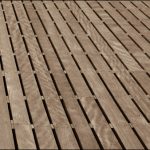
wood deck, composite deck

Which is Better – Wood or Composite Decking?

Ron Hatchett

When deciding to add a deck to your home, one of your biggest decisions will be the type of material you choose. While most decks are constructed with pressure treated lumber (PTL), there really is a large variety of materials from which to choose.

Most people choose some type of wood or composite material to build their deck. Some of the factors you’ll need to consider will be the price of your chosen material and any subsequent maintenance that will be required. Your specific deck design and purpose will also factor into your decision.

Let’s examine and compare the various woods and composite materials to help you make an informed decision. Remember too, that you’ll want to keep maintenance costs in mind when you choose the best material for your deck.

Pressure Treated Wood Deck Material

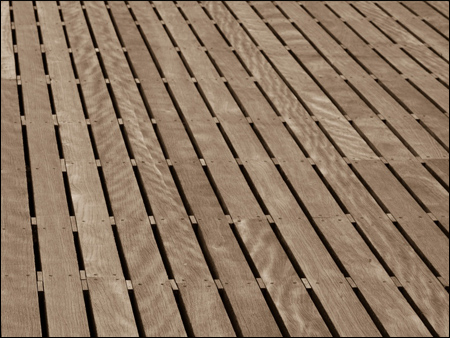
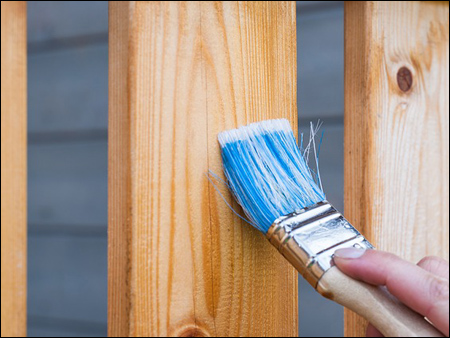
Pressure treated lumber (PTL) is still the number one deck material used by 75% of customers today. The green tinted lumber is economical, readily available, and easy to cut and fasten with nails or screws. Regular routine maintenance consisting of an annual power wash and staining every 2 – 3 years is usually sufficient to keep your deck looking great.

Better Quality Wood Decking Materials

Redwood and Cedar are two woods that are about three times more expensive than PTL, and due to the tannins and oils in the wood, are naturally insect and rot resistant. They both have a rich color and natural beauty which make them an excellent choice for a deck. An annual power wash and coating of finish about every 3 to 4 years will help maintain the beauty of Redwood or Cedar.

Imported Tropical Hardwoods like Massaranduba, Cumaru, Red Taurai, Tigerwood, IPE, and Philipine Mahogany are comparable to Redwood and Cedar. These exotic, richly grained and extremely hard woods are very durable and naturally resistant to rot and insects. However, because these woods are so dense, they may be difficult to cut and drill. The amount of fading from these woods depends upon their exposure to sun, rain and snow. Preservation with a wood stain is recommended to maintain the beauty of the wood.

Composite Decking Materials

Composite material is composed primarily of wood fibers and recycled plastic, such as polyethylene or polyvinyl chloride. This material is very durable as well as being weather and stain resistant. It won’t splinter, warp or split like wood but still requires some maintenance to prevent problems from mold and mildew. Some composites may also show signs of decay over time since they are partially composed of wood fibers. The biggest advantage to using a composite is low maintenance since it will never need sanding, refinishing or staining. Low cost and availability in a wide range of colors also make a composite material an excellent choice for a deck.

Deck Material Considerations

When considering the type of building material for your deck, choosing wood or a composite, you will need to keep in mind the cost of the materials and upkeep required. Depending on the design for your deck, whether small or large, and it’s functional as well as aesthetic appearance, it’s important to consider all your options before making a final decision.

If the cost of the deck material is your primary concern, the least expensive option for deck material will be pressure treated lumber. Otherwise, any of the other woods we have discussed would be an excellent choice for creating a beautiful deck. While their costs generally start about three times that of PTL and increase substantially with the exotic, imported woods we talked about, the overall beauty of the wood may convince you to make that investment.

Maintenance costs for decks will vary depending on whether you have chosen to go with wood or composite. While most woods will require power washing at least annually, composites are nearly maintenance free. Also, most woods will need to be stained or sealed to preserve their natural beauty. Wood decking which is not properly sealed or stained will eventually weather to a soft, silvery gray.

Call Hatchett Contractors

Hatchett Contractors want you to be completely satisfied with your new deck. Our staff is always prepared to discuss all the options with you to design the deck of your dreams. We want you to take pride in our excellent craftsmanship, while at the same time ensuring that you are satisfied with your decisions for your choice of material. We will gladly go over the various choices with you and discuss your options.

Your satisfaction is our satisfaction. We take pride in constructing a deck with your choice of material at a cost that pleases you. Our hope is that you will enjoy your deck with family and friends for many years!

deck planning, weather, lighting

Pre-Planning Your Outdoor Deck

Ron Hatchett

You’ve made the decision to add a deck to your home. Now the fun begins! When planning for the addition of a deck to your home, there are a lot of things to consider.

  • Where will the access point from your home be?
  • Will your deck be an extension of an existing part of your home or perhaps a stand-alone deck?
  • Do you have an existing pool that you would like to have your deck surround to create an outdoor oasis?
  • What type of materials are you considering and budgeting for?

General Outdoor Deck Planning Considerations

What size, shape and location would you want for your deck? There are lots of resources for deck plans to help you decide on a design that’s right for you. Pinterest has a wealth of ideas to get your creative juices flowing. Will your access to your deck be from the side of your home or from the back? What about it being off your kitchen? Will your deck surround any existing landscaping or hardscape designs? Will you have separate areas for dining or grilling? Do you have a pool or a tree that the deck would be built around? Thinking about your ideal location and possible design elements is a great place to start your planning. There are plenty of plans and ideas available. Making your decision will be the tricky part!

Types of Decks

There are so many varieties of decks to choose from, you may have trouble deciding exactly what you want. If you have additional space available, you may be able to consider a multi-level deck or two-story deck. A deck designed off an upstairs master suite could have a second deck directly below. You might decide on enclosing part of a multi-level deck to provide additional storage space. No matter what type of design you choose, the addition of a deck will enhance your overall property value and provide your family with many hours of enjoyment.

Lighting Fixtures and Outdoor Options

Lighting for your deck may be another feature you’ll want to consider. You can add tiki torches to give your deck a tropical flair. What about adding a fire pit or even a built-in fireplace which just may give your deck the ambiance you’re trying to create. If you add a lattice or pergola type of structure, you have the base for hanging lanterns or outdoor lights to provide just the right mood setting. If you do decide on outdoor lighting fixtures, be sure to check with an electrician or your contractor to ensure everything measures up to code.

Privacy Considerations

Privacy from any surrounding neighbors could be another element when considering  planning your deck. You’ll want to probably include designs for constructing lattice work or perhaps incorporating some re-purposed shutters which would provide privacy you’re your neighbors. If you already have trees on your property, they can also be included in your design plan.

Safety Features and Handicap Access

Safety features for your deck, railings or handicap access ramps, will depend upon who will be using the deck. If you and your guests will be entertaining children or elderly individuals, you’ll want to be sure they can enjoy themselves without the risk of injury. Your contractor can advise you on some great safety features in include on your new deck.

Weather In your Location

Consider the weather for your area when planning your deck. Will your deck face the rising sun and be provided with lots of natural light? Will you be using your deck for entertaining throughout the year or will it mainly be an extension of your existing indoor space? You will need to consider the amount of sunlight, and any adverse weather conditions when you design your ideal outdoor living space.

Deck Building Codes and Structural Requirements

Building codes and any structural requirements will need to be considered in the initial planning phase of your new deck. Check on any requirements that could be part of a home owner’s association agreement. Many HOAs have certain rules about installation of additional structures which must be met. Generally, the contractor you will be working with can advise you of any needed licensing or permits which will be required and inspections during the building process.

Call Hatchett Contractors

We at Hatchett Contractors want to be your chosen professionals for helping you to design and build your dream deck. We are here to assist you throughout you initial planning phase. We offer our expertise by providing you with plan designs, answering your questions about materials, and handling the necessary permits and code requirements for your deck. Our goal is to construct your deck with your needs in mind and to meet or exceed your expectations. As always, we won’t settle for anything less than the best!

Customize Your Deck With Accessories

Ron Hatchett

Develop a Theme for Your Outdoor Deck

There are options galore for accessorizing your outdoor deck! From furniture to plants to lighting, creating any theme you desire should be exciting. Probably the best way to approach your decorating will be to determine the main function for your deck. Since you may have completed your pre-planning and even the construction of your new deck, you probably have decided the main function already. Let’s examine some ideas for customizing your deck and accessorizing it for maximum functionality and enjoyment.

Living Room or Family Room Retreat

Depending on the size of your deck, you will want to select furniture that compliments and doesn’t overwhelm your space. If you have planned your deck as an extension of your living room or family room, it may be enclosed. With an enclosed deck, you’ll have a few more options for furniture since weather concerns shouldn’t be a problem. A nice loveseat with comfy cushions or a chaise lounge chair with pillows would be perfect for snuggling up with a good book and your favorite beverage. Choose lighting that will give you the brightness you need for your chosen activities but can be dimmed for a more relaxed or romantic atmosphere. Plants are always a welcome addition to any room and since you may have some small tables, you could have a few potted plants in decorative containers. Whatever you decide to do, be sure to include those personal touches that make it you!

Party Deck Beach Theme

Do you love to entertain or have your friends and family over frequently? Decorate your new deck so you’re always ready to party! A Tiki Bar set-up in one corner of your deck with a grouping of tables and bar stools would be perfect to re-create an island get away! Some tall plants and groupings of lush foliage will create an atmosphere of walking through the tropics. Don’t forget hanging lanterns and even colored string lights to give your deck that party glow. Set up another area opposite the bar for some wicker furniture with comfortable cushions to allow your guests a place for conversation and relaxing. If you have built your deck around a swimming pool, this would be an ideal theme to provide a get away without leaving the comfort of home.

Barbecue and Fire Pit Ideas

Are you the grill master of your family? Your new deck is the perfect place to get that barbecue grill of your dreams! Get your cooking area set up with the proper tools and equipment so you’re ready at a moment’s notice to host a barbecue or just wow your family with your grilling skills. Picnic tables and benches or a nice table and chairs will provide adequate seating where you can serve your specialties. You may choose to have some type of cover over your dining area like a big umbrella or canopy. Don’t forget to add some planter boxes or even hanging planters if you have added an enclosure to your deck. Soft lighting with candles will provide a welcoming atmosphere to your dining experience.

A fire pit for your deck can be a built-in structure or stand-alone unit.  Whichever you choose, you’ll enjoy many relaxing moments gazing up at the stars on a nice clear night. A group of chairs and a few small tables will provide a comfortable setting around the fire.

Sunroom or Greenhouse Ideas

An outdoor deck, whether enclosed or open, can be a gardener’s delight! Fill your deck with plants of all shapes and sizes! Here you could go for a theme of plants like tropical to include fruits, exotic varieties, and trees or just everyday varieties you love. You could provide a work area with a potter’s bench and all the supplies you need to tend to your plants. Place a few comfortable chairs or chaise lounges around your deck and some stools to put your feet up. This makes another ideal spot for relaxing with a good book or having a casual get together with friends.

Finishing Touches

No matter what theme you choose for your decorating and accessories, make sure to personalize your space with some of your favorite things. Books, pictures, and collectables can add that personal flair that makes it “You”. A deck can be enjoyed year-round and provide a wonderful space for entertaining family and friends. Your deck can also be your own personal oasis providing a place for many hours of relaxation. From sofas and chairs, benches and planters, to all the variety of lighting options, you can customize your deck to reflect your personal theme.

Hatchett Contractors is prepared to help you with your finishing touches to your new deck including any outdoor lighting, custom benches, or heating. You can always depend on our friendly, courteous staff to assist you with any stage from planning to completion. We take pride in providing you, our customer, with the very best craftsmanship in the industry.

bathroom flooring, lighting and vanity ideas

Best Bathroom Remodel Features & Ideas

Ron Hatchett

Three New Bathroom Remodel Features & Ideas

When considering a bathroom remodel, you will want to give this some thought and planning. This is the room in your home that you use each and every day to look your best. Your bathroom, especially your personal bathroom, you  want it to reflect your personal style and still be user friendly. Whether you are getting ready to go to work or soak in your bathtub after a difficult day, creating a bathroom that gives you the look and relaxing atmosphere  should be your ultimate goal. Look at your current bathroom and think about the features you like or don’t like when remodeling your new bathroom.

We would like to share a few trends and unique ideas that have the potential to really create an inviting bathroom space for you in your home. These ideas will take your bathroom remodel to the next level, leaving you with a bathroom you look forward to spending an hour or so on a regular basis!

Light Your Bathroom Right – Bring Focus Where You Need It

Lighting can be challenging for any room in your home. The right bathroom lighting is essential! The proper amount of lighting in your bathroom is just as important to consider as the bathroom fixtures you choose.

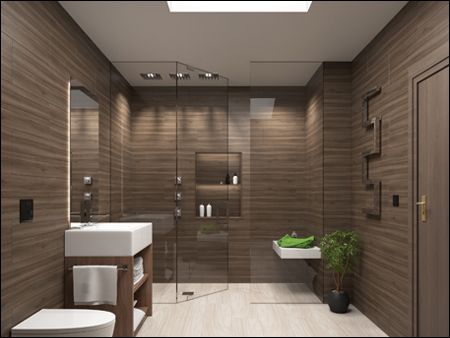
Most bathroom lighting is a ceiling fixture that cast light throughout the room. When it comes time to use the mirror at your vanity, light emanating from the ceiling can often cast shadows. That’s where you may want to consider the difference between up lighting and low lighting. Make sure that you have lighting placed near or around the mirror to ensure that the light on your face is even and bright. This can be done with pendant lighting or wall sconces, for example.

Bathroom lighting can also be your opportunity to go bold! Don’t be afraid to experiment with various lighting fixtures! You can always choose to go for classic bathroom lighting, but you may want to try something a little different. If you want to take your bathroom from blah to stunning, you may want to consider trying chandeliers or decorative wall sconces. Some other ideas are perimeter and maybe even recessed lighting! Lighting variations may be exactly what your new bathroom needs! It really can add a pop of character to a bathroom that oftentimes can make it go from quite ordinary to brilliant!


Choose Your Flooring Carefully – Turn Your Attention Downward

Now that we’ve discussed your various lighting choices, let’s take a look down and think about your flooring options for your new bathroom remodel. Bathroom flooring can also be a well of untapped potential in many bathroom remodels. You have plenty of choices when it comes to flooring options. An increasingly popular choice is porcelain. So let’s talk about some other features you may wish to add to your flooring.

The first one is heating the floor beneath your feet. We’ve all been there: stepping out of a warm shower on a cold bathroom floor. It doesn’t have to be something you deal with anymore! Installing radiant heat to the bathroom flooring can make your bathroom that much more enjoyable while adding more value to your home as well.

Another growing trend is the concept of seamless flooring that allows for a curb-less walk in shower. Not only does this add easy accessibility to your bathroom, but it also adds a certain look of sophistication that many seek in a new bathroom remodel these days. Seamless flooring that melds right into the tile of your bathroom is a great new look many people are opting for these days.

Personalize Your New Vanity – Don’t Waste Any Space


We get it: you spend a lot of time in front of your vanity getting ready each day. We all do. It’s an essential piece to your entire bathroom setup. It’s where the finishing touches get put on; it’s where your nightly routine takes place. Because of this, it’s important to take into consideration your new vanity. Bathroom remodeling is all about taking what you had before and learning from the frustrations it left you with and build yourself a better bathroom.

Another bathroom trend that has become quite popular is a floating vanity. A floating vanity is created by wall mounting the vanity with plenty of open space underneath. The concept of a floating vanity is a great one because it allows you to use the space under the vanity. You may wish to have wheelchair access or a place for a step stool for children, which makes it’s versatility endless. You get to choose the height; you get to choose the depth. It can be a win win situation. New vanities can be customized to give you the freedom to choose how much cabinet space (if any) you have below the sink. Some people need a lot, others not so much. Don’t waste your money or space on installing a pre-built vanity, if it’s simply not going to do the job for you.

Another growing trend is for couples to forgo the double sink. His and hers sinks were a popular choice a few years back. Today, many homeowners are seeing the benefit in using a single sink because it allows them to have more counter space. This can be a better choice depending on your needs.

As always with any remodel, consider you needs and functionality and you’ll be reaping the benefits of a bathroom remodel that you will enjoy for years.

avoid mistakes on your kitchen layout

Common Kitchen Layout Mistakes to Avoid

Ron Hatchett

Three Tips to Avoid the most Common Kitchen Layout Mistakes

Kitchen remodeling is a major renovation project. Many homeowners often overlook some basic things that are crucial to ensure their kitchen remodel is done properly the first time around. The last thing anyone wants is to look back on it a few months, weeks, or even days after it’s finished and think, “I really wish we had done this instead.” The goal of a kitchen remodeling project is to get it right the first time around! You don’t want to be thinking about a next time—at least not for years down the road! So, we hope this blog article about your kitchen layout will help you avoid common mistakes that happen.

As we said, there’s a lot that goes into a kitchen remodeling project. We hope that these tips will help you to avoid them altogether so you aren’t left with remodeler’s remorse in any capacity.

Do Not Forget Functionality – Remember Your Workflow and Prioritize It

When you’re remodeling your kitchen, think about what it is currently like to work around your current kitchen space. Maybe your current stove, dishwasher and sink are not close together. You have to carry a pot filled with water from one side of the kitchen over to the other side of the kitchen to reach your stove-top. This could be one example of how you can use your painful kitchen past to create a flawless kitchen future.

Kitchen Work Triangle

Another kitchen layout mistake some homeowners make is forgetting to utilize the kitchen work triangle. This element of kitchen design has been implemented in kitchens for years, and is renowned for its predetermined measurements for proper placement of your kitchen’s major appliances—the stove, the refrigerator, and sink. The work triangle’s purpose is to keep all major workstations within easy reach for the cook , yet provides enough space around other areas of your kitchen for a smooth flow to your kitchen floor plan.

The kitchen work triangle can often be accomplished by installing a kitchen island. This is where many people can go wrong in their haste to get things done. A kitchen island is something that works well when it’s large enough to serve its purpose but also small enough to not take up too much space. Basically, it needs to make sense to separate that counter space from the rest of the kitchen. If it’s too small, you’ll never use it. If it’s too large, you may as well have simply made that your primary source of counter space.

Another key part of kitchen functionality is to avoid overcrowding. Don’t put appliances too close together is a given, but remember that small appliances can eat up a lot of space before you realize it, so keep this in mind.

Do Not Spend Too Much – Remember Your Budget and Stick to It

The all important stage of planning and budgeting should come first for a reason—to help guide you in the choices you make along the way with your kitchen remodel. One piece of advice we are sure you will hear is to plan all of your large purchases first—things like your fridge, your stove, your dishwasher. All of those major appliances you will need, and the other installations, like your counter-tops, kitchen cabinets, and lighting all to be customized to work around those.

However, when purchasing your kitchen appliances, it’s easy to see the most fancy features and be swayed by them—particularly when it’s the first piece you’re spending actual money on. You might see a refrigerator with a television screen in the door and think, “That’s what I’ve always needed in my kitchen,” and be tempted to splurge on it. But is it really what you’ve always needed? The same can be said for the stove top with eight burners or even the oven that has two separate cooking chambers with separate controls for each. Are these features you will actually use, or are these features simply luring you in by their uniqueness? Of course, you want to view your remodel as an upgrade, but keep in mind which upgrades you will actually use and which will simply go to waste.

Do Not Waste Your Space – Remember All the “Stuff” You’ll Have to Have a Place For

This tip all goes back to ensuring that you’re only bringing what is necessary and functional into your kitchen. Don’t waste your counter space by installing an over sized sink—one so large you’ll never fill it. Use your counter space for the coffeemaker you’ll be bringing back in eventually, or the stand mixer you’ve been thinking about getting! They will all need a place to go, so it’s important to remember that during your kitchen remodeling and plan for them even if these items might not be physically present at the time.

This is also where it becomes essential to ensure you have enough space in your kitchen cabinets. A great idea that has become increasingly popular is the use of toe-kick storage. These are thin cabinets that run along the baseboard in your kitchen and can allow for additional cookware storage. It might seem like one of those fancy features we just told you about that you probably don’t need, however it can come in surprisingly handy when you’re looking for a place to put that extra cookie sheet you’ve got lying around or for that extra serving dish that seems to sit out on your counter more often than in a cabinet because you don’t have the room for these items.

But whatever you do please don’t forget that most often the functionality of your kitchen is all about you and therefore you are the one who’s calling the shots. Make your kitchen work for you!

Bringing ADA Vanity and Cabinet Remodeling within Reach

Ron Hatchett

ADA bathroom remodeling can seem like a daunting task. There’s a lot to remember: grab bar requirements, toilet seat heights, and shower and bathtub accessibility. But it’s relatively simple when taken one step at a time. Something that doesn’t usually come to mind right away when it comes to an ADA compliant bathroom is the idea of accessible vanities and cabinets. Sure, you might think about countertops needing to be out of the way for someone to make it through the bathroom with a wheelchair or a walker, but a lot of times the actual height of the vanity isn’t a consideration a lot of people make—at least not at first. So let’s break handicap accessible vanity bathroom remodeling down a little bit to help you get the ADA compliant bathroom you’re working towards.

What Are the General Requirements?

Let’s start with the basics: what is required of the sink and vanity area for a bathroom to be considered accessible?

  • Height of the sink: Since everything in the bathroom must be easily accessed by someone in a wheelchair, the sink cannot be more than 34 inches above the ground at its highest point. If the sink is being built into a countertop, it must be placed as near the edge as possible to avoid overreaching by the user. Keep in mind that if the rim of the sink protrudes from the top of the counter at all, this will need to be taken into consideration for the 34 inch maximum.
  • Space for knees: At least 8 inches of space must be available for the knees of someone using a wheelchair while in the bathroom. That gap must be from the front of the sink in. Something that goes along with this is also the requirement that the pipes underneath the sink must be protected by either having padded coverings or by having a protective cover of some sort applied to them. A gap of 27 inches is also required from the bottom of the sink apron to the floor.
  • Space for toes: To have safe grounding, there must be 11 inches of space for a person’s toes to reach in from the front of the sink. The toes of a handicapped user must also never be more than 6 inches from the wall of the sink, 9 inches being left between the bottom or the base of the pipes and the floor.
  • Space in front of the sink: There must be 48 inches of space in front of the sink in order for someone in a wheelchair to easily navigate. There must also be at least 30 inches available to one side of the sink.

Some other things to consider in addition to these specific ADA bathroom sink requirements are things like whether a single-handle faucet will be easier for a wheelchair-bound individual to use or how close to the edge of the counter things like soap dispensers or toothbrush holders should be placed.

Work with What You Have

Handicap accessible vanity bathroom remodeling doesn’t have to be nearly as stressful or time-consuming as it can seem to be initially. In fact, there are a lot of not so obvious ways you can use some of the features already in place in your bathroom to make it happen, you might just have to make a couple of tweaks here and there.

When it comes time for your ADA bathroom remodeling, consider the current construction and function of the sink you already have. Is it a pedestal sink? Does it have a medicine cabinet underneath? Where are the faucet handles in relation to the edge of the countertop? All of these can help you determine whether what you have is useable or not.

If you already have a pedestal or hovering sink built in, it can be an easy fix to simply have it either lowered or raised to meet the ADA bathroom sink requirements. If you have a sink that rests atop a cabinet or cupboard, it can also be a relatively easy fix to remove the cupboard space and simply place a cover over the piping beneath the sink. However, you’ll still have to make sure the depth of the countertop is appropriate to meet the required measurements.

Mirrors can also be adjusted to make them useable for those in wheelchairs. If you’re lowering a countertop and sink, simply lower the mirror as well. They can also be placed in additional areas throughout the bathroom to offer full-body angles for those who are unable to stand to use a mirror over the sink. It depends on what you want out of the bathroom mirror, but often mirrors on medicine cabinets are not a good idea for ADA bathrooms because the cabinet will often not be accessible and the mirror itself can often be too small.

Instead of using a traditional medicine cabinet above or below the sink, try opting for a small cabinet that hangs adjacent to the countertop. This offers a great solution that allows those in wheelchairs to still access things like their toothpaste, medicine bottles, or other products while not getting in the way of their mobility, which is obviously key. Plus, it can be a nice little style touch, which can also be important when completing aging-in-place remodeling and a lot of the requirements can leave little room to work with in regards to style or design.

Tie It All Together

With a lot of tedious things to remember during your aging-in-place remodeling, it can be easy to forget about the other little details that must be attended to. You can think you’re finished only to realize that you’ve left linen closets inaccessible, or that the hanging shelves in your regular closet are unreachable. Don’t forget about these simple changes that need to be made. Plan well initially and stick to it, and you’ll be on your way to an ADA accessible home in no time.

Remodeling a Home for Wheelchair Access

Ron Hatchett

If given the choice, almost anyone would choose to stay in their own home as long as possible rather than relocate to a place of assisted living or to a nursing home. It’s your own space, which means you’re more comfortable in it, and you probably also have a certain sense of pride associated in the place you have made yours over the past however many years. You don’t want to leave it behind. But sometimes things can happen and circumstances can arise that might make staying in your own home a little more difficult than it used to be.

When it comes to aging-in-place remodeling, wheelchair accessibility can be a big barrier between individuals and the possibility of staying in their own homes. Sometimes your home simply may not have been designed to offer the maneuverability you might require someday. Things like wheelchair ramps, a barrier-free shower, handicap bathrooms, and other necessities for those in a wheelchair might not have been in the original design for your home.

Fortunately, there are some simple handicap home remodeling tips and tricks you can use to make the place you’re most comfortable a little more comfortable if this situation happens to arise.

The Key to Handicap Bathrooms

Bathrooms can be tricky in regards to wheelchair accessible home remodeling. They’re not usually all that plentiful on space to begin with, so working in ways to make it maneuverable for a wheelchair might seem difficult initially. The key is to take it one step at a time:

  • Barrier-Free Showers
    A barrier-free shower can be an integral addition when it comes to a handicap accessible bathroom because it allows you to roll a wheelchair right inside without having to fully transfer out of it. This means you won’t be left having to support yourself for an extended period of time simply to get inside. They also often feature seats or benches for you to use throughout your shower as well so you aren’t left standing or getting your regular chair soaked either.
  • Walk-In Bathtubs
    Walk-in bathtubs are similar to barrier-free showers in the sense that they allow for easy transferring from a wheelchair. However, this installation is similar to a traditional bathtub, the only difference being the side paneling has a door that can be open and closed after use while still allowing a proper seal so water does not flood into the rest of the room.
  • Grab Bars
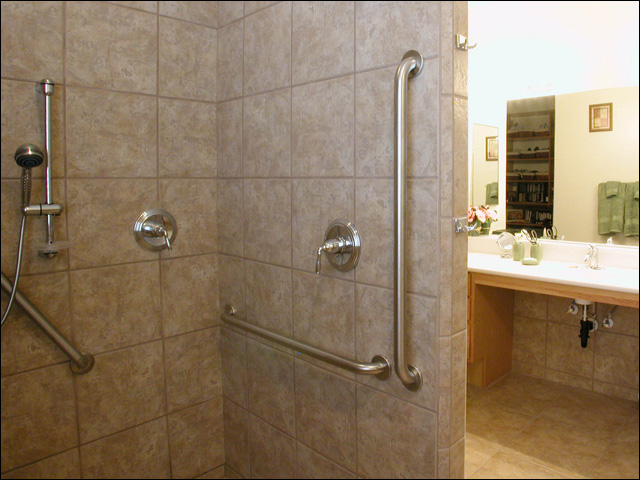
    These are actually a requirement in ADA showers and baths, and in handicap bathrooms in general. Certain placement requirements must be met when it comes to installing grab bars inside your bathroom during aging-in-place remodeling. For example, there must be grab bars on multiple surfaces in a shower, in front of and next to the toilet, and other places to assist you in transferring from a wheelchair.
  • Toilet Seats
    The height of a toilet might not seem like the most important thing, but it can actually be either a very big help or a very big hindrance when it comes to an ADA bathroom. If the seat’s too high, you might not be able to reach it when getting out of your chair. But if the seat is too low, you might not be able to get off of it when finished. Even with the assistance of a grab bar or two, it is still important to get the height of a toilet seat just right, but that can even vary from person to person, so tread carefully on this one.
  • Vanity/Sink Accessibility
    This one can be a relatively easy fix by simply using a pedestal sink or counter that allows you to roll your chair right underneath it without the need of standing. The tricky part can be when it comes to reaching the handles of the faucet from the chair, so make sure to place those appropriately to avoid overreaching that can cause strain on the user.

There’s a lot to consider when it comes to ADA showers and baths and bathroom remodeling, but as long as you follow each step as it arises, you’ll be on your way to an accessible bathroom in no time.

Handicap Kitchen Remodeling

A lot of the elements found in a handicap bathroom can also be applied to a handicap kitchen, such as counter and sink heights, but there are a few others to keep in mind too. A lot of kitchens have space between countertops and kitchen islands that might not be easily accessible for those in wheelchairs. If you have enough space from your original design that’s great. If not, you’ll have to add a little bit by either trimming down or simply moving one or the other (most likely the island).

Also consider the types of cabinetry you have during your handicap kitchen remodeling. A lot of times traditional cabinets will be too high to reach from a wheelchair and therefore an alternative must be sought. The most popular way to resolve this problem is to install pull-down cabinet shelving that allows shelves in lower cabinets to be slid out for easy access and then slid back in for storage.

Other Small Quirks to Keep in Mind

While bathrooms and kitchens are the main places of focus when it comes to wheelchair accessible home remodeling, there are a few other things to keep in mind too. One of these is the idea of reachability in other places throughout your house (like closets and pantries). Bringing things lower or closer to the edge of counters or other surfaces can solve a lot of the issues during handicap home remodeling.

This type of project can certainly seem daunting with the installation of things like wheelchair ramps, but there are ways to do it easily and efficiently. As always, consider the costs of something like this first, however. Plan thoroughly from the start so you have an idea of what you’ll be getting yourself into and how much you can plan to spend. Most often it’s worth the cost to stay in the place you love most, but sometimes the cost can simply be too high to warrant such a remodel.

The Ins and Outs of In-Law Suite Construction

Ron Hatchett

The first thought that could come to mind when the idea of having an in-law move in with you could be one of hesitancy or uncertainty. Not to that in-laws are bad (not all of them, at least), but you’ve worked hard to create a space that is your own with your spouse and the thought of having a parent move in with you might take away at least a slice of that feeling of independence. That might be your first thought, anyway. But there are some reasons why that first thought or impression might quickly change.

Having an in-law move in doesn’t necessarily mean they become a permanent resident of your guest room—quite the opposite, in fact. Many people who decided to move forward with a plan like this decide to build a sort of guest room specifically for their in-laws. This is known as an in-law suite and can actually come in quite handy when plans are executed properly and the construction is complete. We’ll go into more detail in a minute, but building a suite for your in-law that includes (in some way, anyway) his or her own bathroom, kitchen, and bedroom can still give you the sense of privacy and independence you need while also allowing them to be close enough for you to care for them and just be able to spend more time with them in general.

Reasons to Build an In-Law Suite

While building an in-law suite is often done with the intention of having the in-law move in on a long-term basis, that doesn’t always have to be the case. It can be used if you have in-laws who live out of state or far enough away that they might stay the night if they come to visit. It might not seem necessary to have a separate suite for them if this latter situation applies to you, but think about it this way: if you have a space separated from the rest of your house designated for them, that means they can still be staying nearby without completely invading your space. By giving them their own space, you are essentially maintaining yours.

The same can be said if you have other people who might be visiting at any given time. Maybe you know others who live states away who like to visit every now and then, or you have other relatives who might need a place to stay for a couple of nights. With an already-built in-law suite, the solution is already present in your home (or near it), and you won’t have to worry about anyone feeling like they’re invading your space.

An in-law suite also offers you the opportunity to host guests you might not actually know yourself. Vacationers are often looking for alternatives to traditional hotel or motel stays when visiting different places across the country, and your in-law suite could be the perfect solution for them. Websites like Airbnb are the perfect place for you to make a little extra cash when your in-laws aren’t in town using your suite.

Construction Considerations – In-Law Edition

So you’ve decided to move forward with your in-law suite construction. That’s great! But don’t move too quickly, now. There are some things to consider first:

  • Where Are You Going to Build It?
    Choosing the location for the suite can depend a lot on permits (which we’ll discuss in a minute), but a lot of it can boil down to whether you want it connected to your home or simply in a space near it (like an unused portion of your yard or in an unused garage, for instance). You can also choose to convert unused rooms in your house into a suite so they’re near enough to, say, a bathroom so you don’t have to go through the trouble of building a new one.
  • How Will You Power It?
    The answer to this question might seem obvious (electricity), but what we mean is will you connect it to your already existing power for your home, or will you choose to separate the power to this suite? Separating the power can give you the benefit of more easily controlling or monitoring how much power your new “tenants” might be using. This can come in handy should you choose to rent the space (permit-warranting) when your in-laws don’t need it.
  • Are There Special Accommodations That Need to Be Made?
    When building a space for your in-laws, some multigenerational considerations may need to be taken into account. Will they require wider doorways to fit any walking assistance they might use? Are there wheelchair accommodations that need to be met? These things are all easily integrated into a new living space, but only if they are in the plans from the start.

Know Your Building Permits

This is area-specific, but certain states or cities will limit the types of construction you’re allowed to complete on residential property before it is no longer considered to be, well, residential property. Some places consider constructing a second kitchen makes your property a rentable space, which also means you will need a special permit for that.

Another building permit to take into account deals with your septic tank. Many tanks are only able to support three bathroom connections, so make sure you look well into that if your in-law suite will put you over that number.

All Around Benefits and Value

As you can see, there are a lot of great reasons why you might choose to build an in-law addition to your house. Costs can generally range from about $5,000 all the way up to $100,000 and beyond, but they usually end up paying for themselves. The additions can also even add value to your house in some cases. Think about how many people you know with elderly in-laws who might be looking to buy a new house with a space for them all to live comfortably? The new space can also save you and your in-laws money on the other types of care they would have to seek living on their own.

As with any project like this, consider all of your options, but make sure you’re not as hesitant about an in-law suite as you may have been initially.

Future-proof Your Bathroom–Prepare for Grab Bars

Ron Hatchett

Building a new bathroom (or the task of general bathroom remodeling) can be a daunting task in and of itself. You spend a great amount of time planning what you want the bathroom to look like and how you want it to function after it’s complete, but there is a lot to be said for those who think even further ahead than just to the point of having their dream bathroom finally finished and usable.

Many home builders today have started to consider what functions and features their bathroom might have to serve and have in a more distant future than simply the months or years it can take to build a home—they’re thinking about what their bathroom will need to look like and do for them decades down the road.

Future Proofing Your Bathroom

Now that people are staying in their homes for longer periods of time, they have turned their attention to topics such as ADA bathroom remodeling and universal design when it comes to home improvement projects. Planning for these can ensure that your home is suitable and habitable even if your health or the health of your loved ones begins to deteriorate for any reason. Obviously, nobody hopes for these things to happen, but planning for them is always a better option than simply hoping they do not occur.

The concept of universal home remodeling design in bathroom futureproofing also comes in handy if you ever find yourself placing your home on the market because it can increase its market value and the number of homebuyers who might express interest. Just something to keep in mind.

Looking Ahead to Build Today

There are a lot of things that can happen that might change the way you interact with your home. Mobility issues can arise, the degree of the varying severely. Sometimes the only accommodation that might be needed is allowing space for someone with a cane to walk safely, but sometimes the need for a wheelchair accessible home can also come up. That’s why there is such an emphasis on ADA bathroom remodeling and universal design in today’s world.

However, there are a lot of requirements that need to be met before a bathroom is considered ADA compliant. That’s where seeking the help of a special universal home remodeling design specialist can come in handy. It’s hard for you to know what you’ll need before you actually need it, but these specialists have experience helping those who might already be facing the struggles of aging in their homes and therefore they also have the experience of helping someone just like you plan your bathroom futureproofing. The tips they can offer are as simple as placing reinforcement boards in a location you might need a set of bathroom grab bars in the future. These boards don’t have to be visible until the time comes to actually install the bars, but they become essential when that time actually comes.

It’s important to always have a plan in mind, but especially if you are hoping to design a bathroom that will be able to accommodate you through various phases of your life.

Blocking Now for Fewer Obstacles Later

The idea of placing reinforcement inside of your bathroom walls—or any walls for that matter—is called blocking. This blocking is then later used to offer the reinforcement needed for grab bars when they are installed. Grab bars are meant to support a person’s weight, so there obviously needs to be some support behind the walls that hold them—the drywall will not suffice to help support anybody.

For bathroom grab bars, as with many other forms of ADA compliancy issues, there is a certain set of codes that must be met to have a fully compliant handicap bathroom. The requirements are as follows:

  • A vertical bar placed in front of the toilet with horizontal bars next to and behind it
  • Roll-in showers (wheelchair accommodating) and transfer showers (non-wheelchair accommodating) need bars running vertically on at least two walls
  • Transfer showers need additional vertical bars (at least one) on the same wall as the showerhead

Getting these grab bars in the correct place are crucial when it comes to passing inspection for a truly handicap bathroom.

Now, there are a few different ways to install this blocking. You can choose to install blocking or cleats in the form of solid wood between studs at the desired height. Cleats can be placed across several studs to add reinforcement.

Spot reinforcement is not your only option, however. Whole areas or walls can be reinforced as well. This is done by applying heavy plywood over a large area of studs to provide a base for the installation of grab bars in the future.

Molded fixtures such as acrylic or fiberglass bathtubs or showers do not have the proper support needed for grab bars, either, much like bare drywall. Installing grab bars in these places calls for additional support that can be added in the form of solid wood or other substances of blocking to be installed in the space between the acrylic or fiberglass and the actual wall. This space is left due to the thin nature of the tub or shower surfaces, but adding it later can be difficult, which is why it is a good idea to plan ahead on where these bars will need to be places so you can install the reinforcement beforehand.

Save Yourself (or Others) the Hassle of a Remodel

Bathroom remodeling in general can be a huge inconvenience—mostly because it can be time consuming, displacing to families, and expensive—not to mention the hassle ADA compliant remodeling can be. That’s why many are choosing to futureproof their bathrooms when building them rather than waiting until the need arises for things like grab bars to prepare for them. Whether you are looking to age with your home, or simply want to ensure that your home does well on the market should you choose to sell it, it’s never a bad idea to plan ahead. You can save yourself (or whomever ends up living in your home) the trouble of ADA compliant remodeling by taking certain steps now to prepare for the inevitable future to come.

1 2