Accent Kitchen Lighting

Ron Hatchett

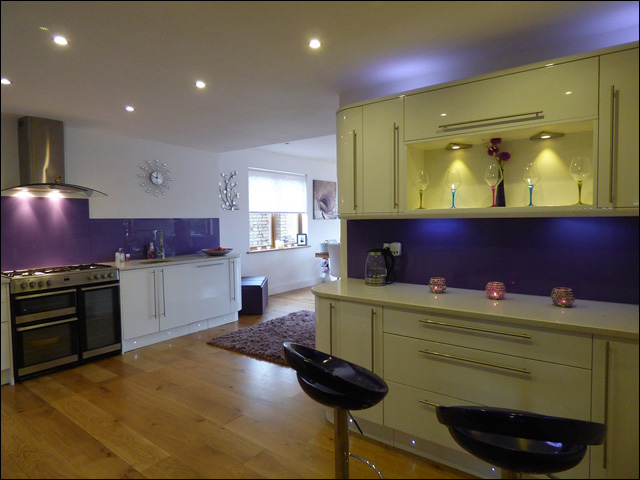
The different purposes the kitchen serves calls for variations on the lighting you need to set the mood and environment. Learn about the difference between task lighting, ambient lighting, accent lighting, ideal light placement as well as ideal lighting elements and methods.

wheel chair accessible ada bathroom

Elements of an ADA Aging-in-Place Bathroom

Ron Hatchett

It’s an increasing ideal: staying in a single home for a number of decades. Things change in that amount of time, and as much as we might care to deny it, one of those things will be you and the people you care about. A home can only grow with you so much before you have simply outgrown certain aspects of it. That’s why the idea of an aging-in-place home has become more and more common lately.

Basic Design Concerns in an ADA Bathroom

When it comes to ADA bathroom remodeling, there are some general things that need to be considered right off the bat. There are certain constraints that can make it difficult to plan out how to give an aging-in-place bathroom certain features like handicap bathroom access for wheelchairs and other types of mobility assistance like walkers and canes.

In terms of a handicap remodeling especially, it is important to get a grasp of what is already in place and reusable in an existing bathroom. This is where aging-in-place bathroom remodelers can come in handy. Maximizing the use of the available square footage and maintaining any fixtures like water lines and piping are their specialty.

When going through a remodel, simple aspects can be overlooked that contractors can help you address right away. This includes ensuring that door widths are appropriate in order to accommodate wheelchairs, or to even ensure that smooth but traction-providing flooring is used throughout the bathroom as well.

But some might not want to deal with aging-in-place bathroom remodelers or are simply designing a bathroom from scratch, so let’s discuss some important elements of this process to help you create a space that can suit your needs well into the future.

Ensuring Wash Spaces are Accessible

There are a few main elements that need to be present in an aging-in-place bathroom, and one of those is an accessible wash area. This can include a bathtub or a shower, but the key is that it’s easy for the user to get in and out safely.

One very common option is a barrier-free shower. This type of shower has a floor that is flush with the rest of the bathroom, meaning there is no curb or step that you need to take when entering. They are often spacious enough that you can bring a walker or wheelchair inside with you if the need should arise. A barrier-free shower also often features a shower seat that you can transfer to so you don’t need to stand throughout the entire shower, which can sometimes be lengthy.

Another option includes walk-in bathtubs. These often feature a door that opens and then closes again, creating a seal that still allows the tub to fill with water without flooding the rest of the bathroom. The issue some might have with these, though, is that there will still be a small step you will need to take to get inside. It’s not nearly as great as the step of a traditional bathtub, though, so can still be beneficial for many people.

Both walk-in bathtubs and shower options still often require some form of grab bars to ensure true handicap bathroom access.

Toilets and Sinks Within Reach

It probably goes without saying that toilets and sinks are the other essential findings in a bathroom, and it also shouldn’t be much of a surprise that these too will require some altering for aging-in-place bathrooms.

When it comes to the toilet, the most important things are going to be the height and location within the bathroom itself. There needs to be enough space allotted around the toilet in order for it to be easily maneuverable and accessible. Part of this is going to come in the form of having grab bars here in addition to in the shower/bathtub. This will help decrease the likelihood of falls or injuries. A simple thing that many forget is also the location of the toilet paper roll. If it’s too far out of reach, there’s the risk that you or your loved one could fall or strain themselves while reaching out for it, so make sure that’s accessible too.

Once finished with the toilet, the next natural step is to visit the sink or the vanity area, so of course that must be accessible too. Most often ADA bathroom vanity access is granted by having a pedestal type sink setup or a counter that allows a wheelchair or walker to be rolled right underneath the sink. While using the sink, the counter or the sink itself can be used as support if a walker is being used normally, and then the walker can be wheeled right out immediately afterwards.

An alternative to the pedestal type of design is to simply wall-mount everything: the sink, the mirror, the towel rack or hook. By doing this, there isn’t anything that could obstruct the user’s path of movement across the floor anyway—it’s a more simplified option for ADA bathroom vanity access.

The Future of your Bathroom

While aging-in-place bathrooms might be a relatively recent concept, ADA bathroom remodeling in general is not. There are plenty of resources out there and plenty of people who have gone through this process before. Even contacting a specialty remodeler can be a good idea because it gives you the opportunity to see sample bathrooms and how they are typically laid out. It can show you the various options so that you can make the right choice for your bathroom or the bathroom of your loved ones.

Of course, simply seeking these examples does not by any means imply that you have to have the remodeler complete the job itself; you can still just as easily make a DIY project out of your handicap remodeling, but it is important that you get as much information as you possibly can during your planning stages. That goes for any DIY project, but especially this one if you’re planning a bathroom intended to last you for as long as aging-in-place bathrooms typically are. (Hint: It’s a while.)


Plywood vs. Particle Board – Your Cabinet of Comparison

Ron Hatchett

When it comes to kitchen remodeling, one of the age-old questions and debates comes in the form of using plywood vs. particle board as your primary building material. Because of their varying forms of construction, each substance can help you achieve different kitchen cabinet quality goals. Depending on the kitchen design ideas you have in mind, each material has its plusses and minuses for your overall remodel. Let’s take some time to dive into these a little more in-depth so we can help figure out whether plywood or particle board is the best solution when it comes to your building needs.

How are Plywood and Particle Board Even Different?

Many who are new to the realm of kitchen remodeling or remodeling in general can commonly be confused about what the differences between these two materials even are. There are many similarities between them that can cause them to seem almost interchangeable. This isn’t the case, and it’s important to understand their basic differences when deciding which substance to use. Here is a list of general features for each:

Plywood:

  • Made of layers of wood veneer that are glued together, using alternating grains of wood to increase stability
  • Features superior shearing properties which allow it to resist pulling forces more reliably
  • Offers higher levels of tensile strength, also giving it a stronger ability to bear weight
  • Often weighs less than other building materials, such as particle board, which can be an important factor when building and hanging new kitchen cabinets

Particle board:

  • Constructed gluing and pressing wood particles together, sometimes by using a mold to do so
  • Features higher levels of resistance to various environmental factors such as temperature fluctuations, which can be beneficial in a kitchen setting
  • Often costs much less than other building materials, including plywood, because of its use of more recycled than fresh materials

Plywood and particle board are both used equally often when used in projects such as constructing kitchen cabinets. When given a cherry, maple, or birch finish, you most often won’t even see a difference in the type of material you choose to use. However, the differences laid out above should be considered in regards to your specific kitchen design goals to determine which route you should choose.

Plywood vs. Particle Board, a Closer Look

Choosing between plywood and particle board doesn’t necessarily mean choosing quality over anything else. When used and constructed properly, each material can result in the same kitchen cabinet quality. However, sometimes achieving that quality can have additional costs associated with it.

One example of this comes when choosing particle board as your main construction material. Particle board is known to have a lower resistance level to moisture. Often, the end grain on particle board cabinets will be left exposed (it costs extra to seal the bottom edge of a cabinet box), and therefore water can be absorbed through this surface. If left unsealed, particle board will tend to swell over time, resulting in a warping or distortion of shape in your kitchen cabinetry. Plywood is much less likely to be susceptible to the same levels of moisture that particle board will be, however neither material is completely impervious to the effects of water damage.

Another thing to consider is that while particle board may be cheaper to use when constructing your new cabinets, the material itself is also often harder to handle when doing so. This isn’t solely because of the fact that it is a heavier material, but also due to the fact that the nature of the wood grains used within it make it harder to drill and screw into. This makes it increasingly difficult to assemble and to hang when the time comes to do so. Many might find the hassle this can cause not worth the money you could save by choosing this material. This comes down to preference.

The Finishing Touch

When it comes to the overall appearance of your finished cabinets, we’ve already said that most of the time you won’t even notice a difference between those built with plywood and those built with particle board. When finished properly, the differences are miniscule. However, the process of finishing itself can sometimes go more smoothly depending on the material you choose.

The consistency with which particle board is manufactured means that it can offer a smoother and cleaner feel to the touch, which can in turn also offer an easier surface to paint and finish. The material is often harder, flatter, and slicker, which means that finishing materials will apply more evenly.

Plywood on the other hand is often a more uneven surface because of the grain patterns that are used during its manufacturing process. This can be remedied with additional sanding, but many renovators and remodelers don’t want to waste their time with that extra step, which is understandable. However, without the manual sanding, the uneven plywood surface can absorb the finishing materials and paint inconsistently, which can then result in a rougher finish that is less pleasing to the eye.

Ultimately, Your Preference is Your Choice

As we’ve laid out the differences and how those turn into advantages and drawbacks of both plywood and particle board, you can see a little more clearly that what this whole debate boils down to is your preference. Maybe you’re okay with paying a little more with a lighter weight set of cabinets, even if it does mean a little additional finishing work on your end. Maybe because of the type of walls and fixtures you can reasonably utilize in your home, plywood is the only option that makes sense for you. If you’d like a cheaper option that might be just a little harder to put together, then particle board might be the best route for you. You can always contract a little help in assembling and hanging your new cabinets, so maybe that drawback is not much of a drawback at all for you. Whichever route you choose, there are always ways to make your new cabinets look their best and give your kitchen the fresh and updated look you have in mind.

Combining and Balancing Living Spaces

Ron Hatchett

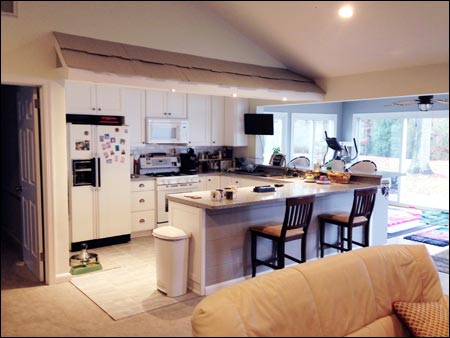
You live in a house that has one or more rooms adjacent to, say your kitchen, for example. You may think it would be nice to open up the space by combining two rooms into one with more open space. However, before this vision of yours for a grand formal dining area can become a reality, complete with wet bar, breakfast nook, and/or travelling service island, you’ve got to do some homework. There are several factors to consider in order to ensure a successful residential structural remodeling project.

Home Remodel Cost Factor Considerations

One of the obvious points to think about in any sort of remodeling work is the cost of work to be done. Depending on the scope of the project, it may be necessary to hire an electrician, plumber, carpenter and even an HVAC technician. That’s the short version of the list and may not include all of the examples listed… but such factors are what will determine your long-term cost. It can be as little as a few thousand dollars or more, depending on the scope of work to be done.

It ultimately will depend on the kind of wall that is being removed and what embedded systems will need rerouting. Labor costs also vary depending on region and quality of the contractors involved. The costs involved to remove a non-load-bearing wall, whether for a one or two story home, can run between two and three thousand dollars. To remove a load-bearing wall–whether one or two stories–can cost a bit more, but it is wise to consult a structural engineering professional to get a better idea on the cost of such a project.

Regardless of the size of your project, it is advised to plan for an additional twenty percent to cover unexpected issues; and if you don’t end up using it in the construction of your amazing new gathering area . . . use the remaining funds to throw a party for your friends and show off your newly renovated space!

Residential Structural Support Factors

One of the factors to consider is, what if the wall separating them is structural?

Good news . . .  the structural wall can be removed and you can open up your room(s) the way you want to. You will need to replace the load bearing (structural capacity) of the wall, so consult a local home remodeling professional before you get started to make sure the work is done properly and in accordance with building code.

Many homeowners oversee their own remodeling projects. However, if the work to be done is overly complex (i.e., the aforementioned removal of a structural wall), you may need to hire an experienced home improvement consultant. As a general rule, it is optimal to consider hiring someone experienced in home construction to oversee such a project.

Why Consult a Residential Structural Engineer?

For a project such as the one discussed here [combining two rooms into one] you are going to want to consult a Residential Structural Engineer. In many cases, homeowners can’t pursue major projects without applying for permits and submitting professional plans. While architects are experienced with structural integrity blueprinting and design, the experience of a residential structural engineers are more versed including code compliance. A structural engineer can oversee those aspects for you and ensure a successful project.

Hatchett Contractors, Inc. can provide professional structural engineering services to assist you in combining and balancing living spaces in your home. We can guide you through your project from start to finish and guarantee amazing results that you will love to live with! Contact Hatchett Contractors, Inc. for a consultation today!

Consult with an Experienced Residential Construction Pro

Hatchett Contractors, Inc. has performed numerous home structural remodeling projects over the years throughout Hampton Roads. Give us a call for a free estimate to have an experienced Virginia Class A home remodeling contractor assess what options you have for your idea.

1 2